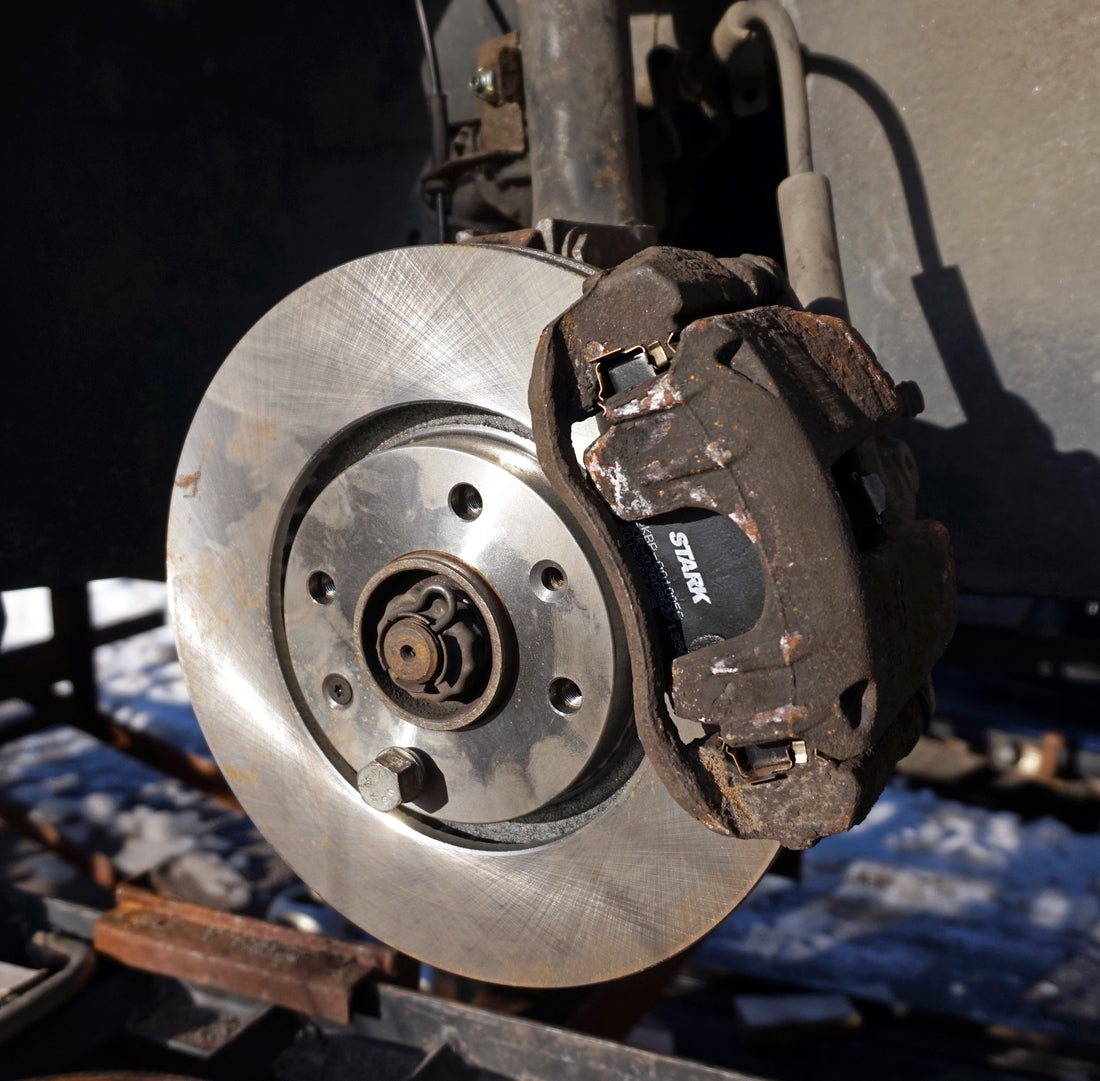
Brake caliper seized? This is a common problem, but fortunately it's one that often can be fixed right in your driveway, with a minimum of tools. When this happens, typically one or both of the slide pins have become seized in the brake caliper mounting bracket.
They seize for a few reasons; heat from the brakes, water and salt getting past the rubber seal, lack of maintenance...
These pins allow the caliper to move then the brakes are applied and then return to their static position when the brakes are released. If they get stuck, it will cause premature wear to the pads & rotors and will also cause your fuel mileage to drop and can cause the vehicle to pull to one side when the brakes are applied. It's usually fairly easy to fix.
You'll need the following tools;
- Jack and jackstand
- Wrench for wheel lugs
- Hammer - 16-32 oz
- Large vice grips
- WD40 with straw
- Small flathead screwdriver or dental pick
- paper towels/shop towels
- Fine grit emery cloth
- Propane torch
- Ratchet & correct sized socket
- Correct wrench and/or adjustable wrench
- High temp heavy duty grease
- Anti-seize
To free the sticking caliper, first you'll need to jack the vehicle up at the corner where the problem caliper is. Then place a jack stand under the frame or chassis point where it can safely & securely support the weight of the vehicle & lower the weight of the vehicle onto that jack stand. You can leave the jack in place for added safety.
Now remove the wheel.
Take the screwdriver or dental pick and gently pry open the rubber seal around the end of the slide pin, where the pin goes into the Caliper bracket. Now take the WD40 and put a squirt into the cavity under the seal, being careful not to get any on the rotor or pads.
Now use the ratchet and socket to remove the caliper bolts. You may need an open end wrench for the hex on the pin, to hold it while removing the caliper bolts.
Then pull the caliper out of the mounting bracket and secure it to the suspension or frame of the vehicle, being careful not to stretch, twist, kink or damage the rubber flex brake line. You can use a piece of wire or a larger Zip tie to secure the caliper.
This is the point where you usually discover that one or both of the slide pins is seized in the mounting bracket. If they are, squirt a bit of WD40(or equivalent) into the rubber seal that seals the pins from water and dirt. Take care not to get any on the rotor or pads.
First break the pin free by spinning it with a socket wrench and the correct socket for the pin.
 Vice grips firmly attached to the hex on the pin.
Next firmly attach a set of vice grips to the flats of the hex on the pin and try to rotate while pushing firmly on the body of the vice-grips towards the vehicle. Sometimes this will be enough to get the pin to slide out of its hole.
If that doesn't work, you'll need your propane torch....
 Using a propane torch to heat the caliper bracket.
Heat the section of caliper where the the pin resides. Move the torch back and forth along that section, keeping the torch moving. You'll need to heat this area up to several hundred degrees. Once heated, set the torch aside and take your hammer and tap on the body of the vide grips, as near the pin as possible, while using your other hand to rotate the pin back and forth.
 Using a hammer to tap the vice-grips, while rotating the pin.
Do this until the pin is removed.
Once you have the pin free, you'll need to clean it up with a cloth, and possibly a mild emery cloth. It with likely have rust and dried grease & dirt on it. The should be 2-3 narrow flats machined into the surface, lengthwise along pin. These are for trapped air pockets to release when inserting the pins, so ensure that they are cleaned up as well.
Once cleaned up, ensure the hole for the pins is cleaned out and free of dirt and debris. Now mix a bit of anti-seize with the HD grease, about 9 parts grease to 1 part anti-seize.
Apply a light layer of this mixture to the shaft of the pin and also add a small dash of WD40. Insert the pin back into its bore, rotating the pin and sliding it in and out at the same time. Remove the pin and re-apply another light layer of the grease mix and a touch more WD40 to the shaft and repeat. Now re-insert and repeat the same procedure as before. This ensures that the the hole and pin are fully greased. Then push the pin all the way in and hold until all trapped air has escaped. You may have to rotate the pin while doing so and you may have to repeat a couple of times to ensure all the air is out.
An Easy way to clean your whole vehicle
Shop the best rustproofing products
Once done, add more grease mix to fill up the air space in the seal. You can use the small screwdriver, or dental pic to assist with this process. Be gentle and careful not to damage the rubber seal.
This will help prevent water & salt from getting into the pin/bore which is what causes the seizing.
Now re-install the caliper and torque all fasteners to spec.
Each fall and spring when switch back and forth from winter and summer tires, or when your tires get rotated, you should re-lube each of the pins. If you do this as part of normal maintenance, you'll likely never get stuck pins again.
While you're at it, inspect the pads and rotor for wear etc.
None of our Blog posts are written with AI. All our blog posts are fully written by a real person, sharing real world knowledge and expertise.